 |
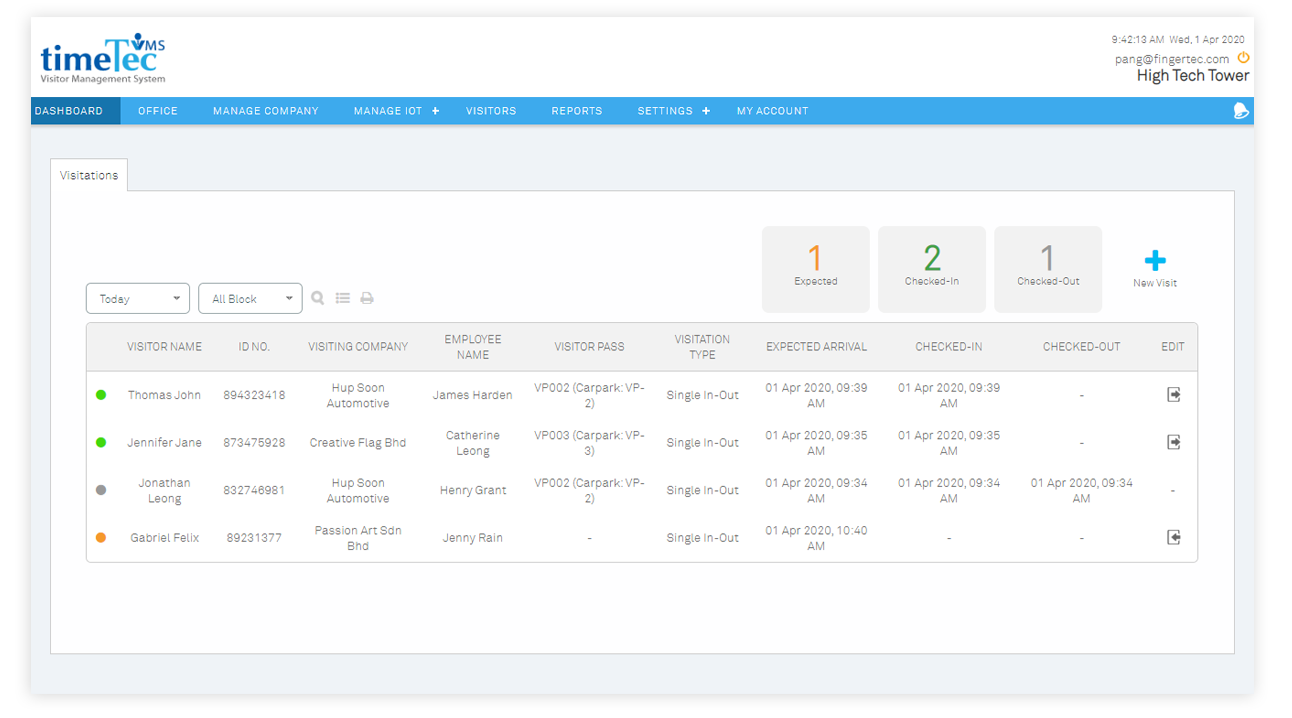
| Dashboard |
| We have revamped the Dashboard with a new display style. |
 |
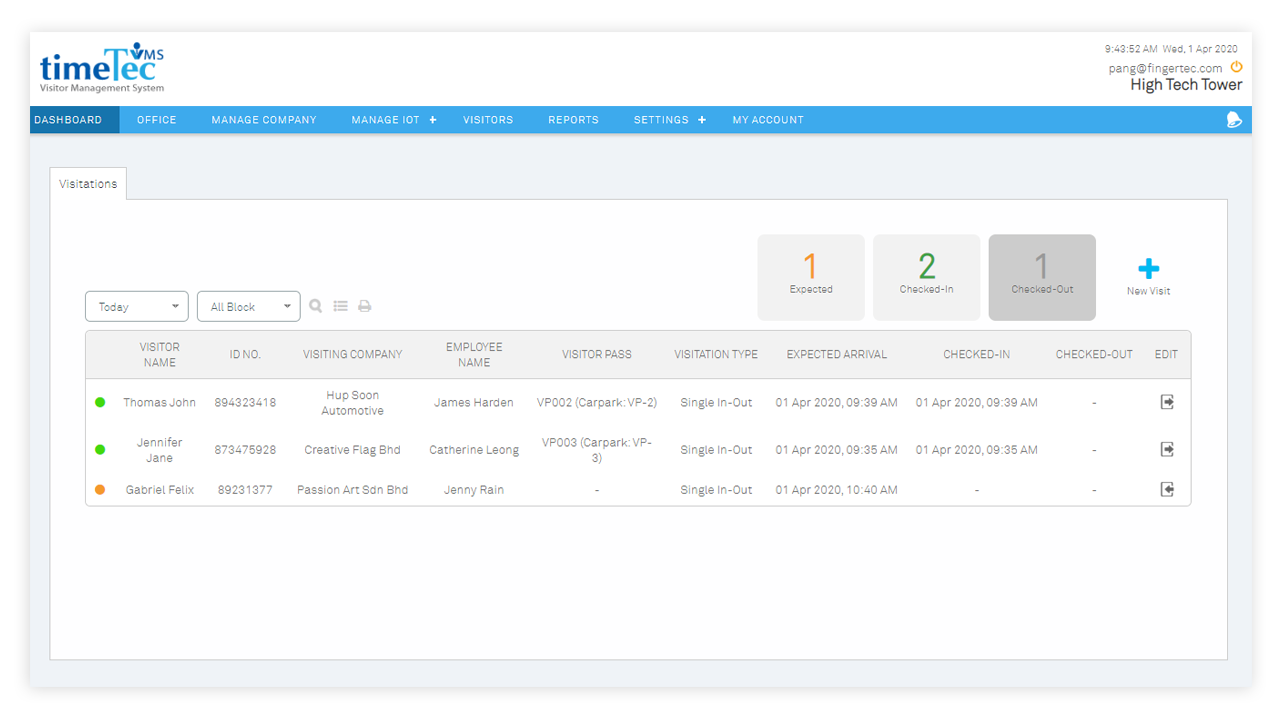
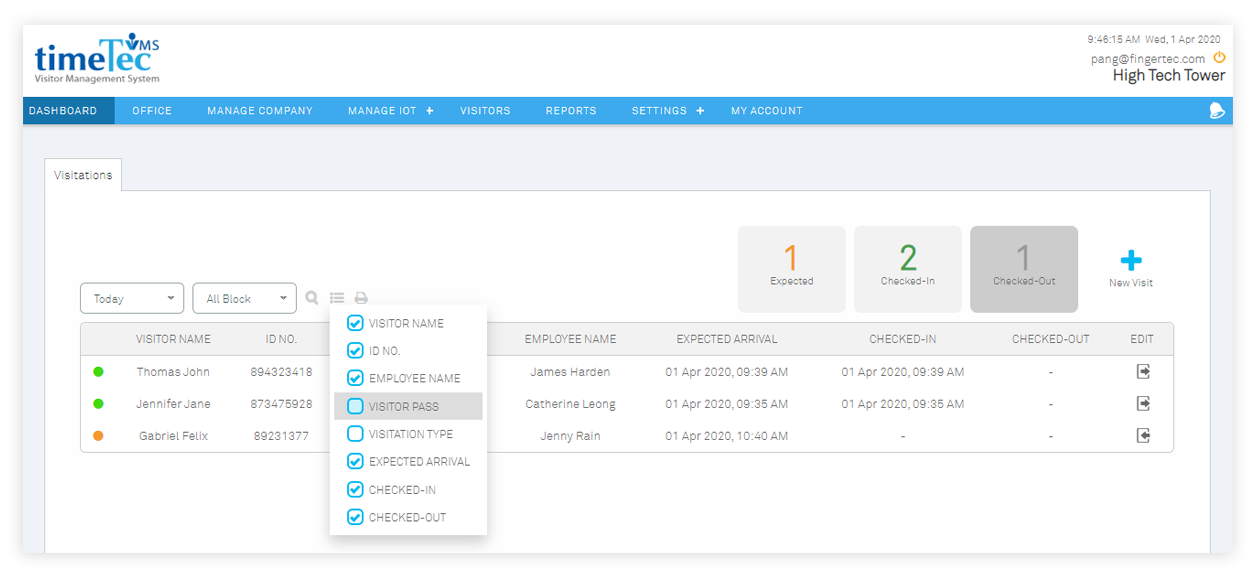
| Users are able to filter the listing by selecting/deselecting the categories using the top right icon. Also, users can hide the unused column by using the column feature. |
 |
 |
| Walk-in registration form |
| The form is revamped to standardize with the operation in i-Vizit. |
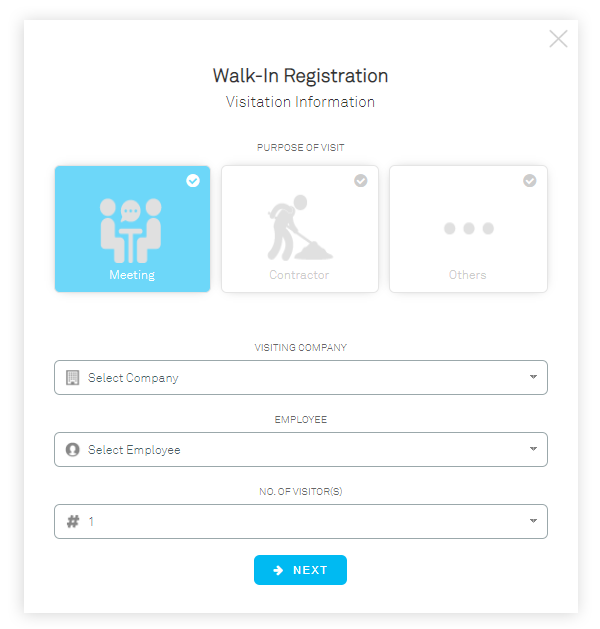 |
| It also has the feature to capture the photo of the visitor. |
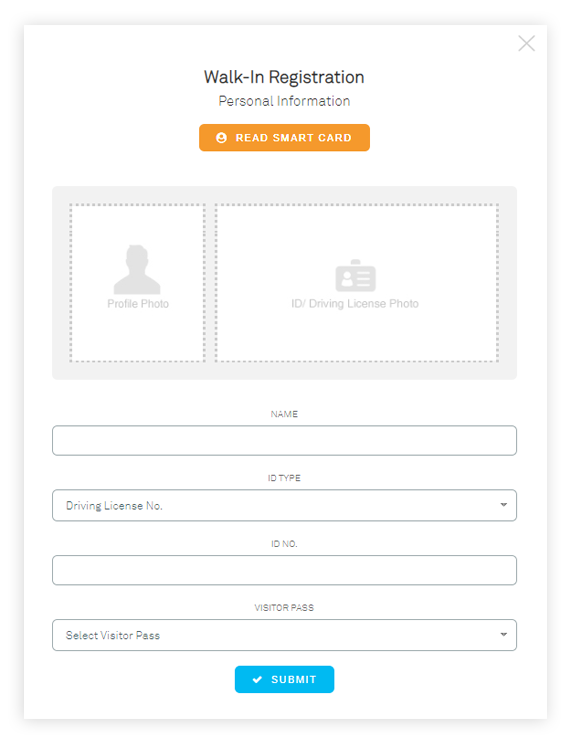 |
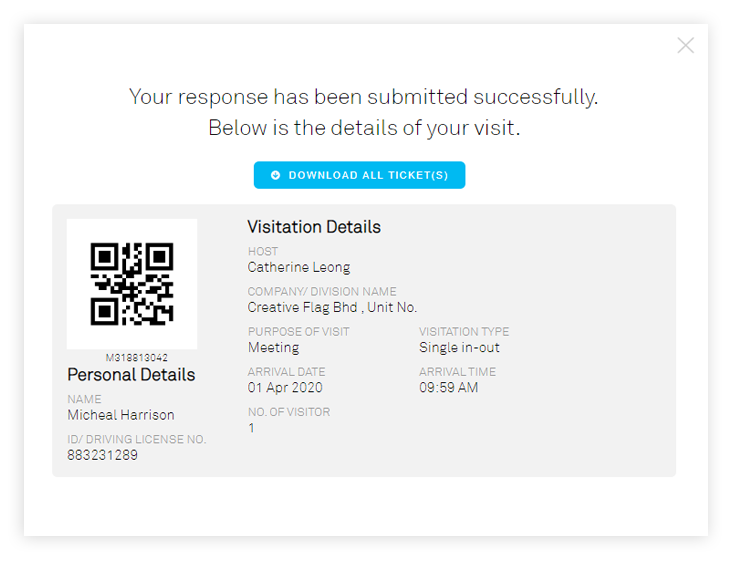
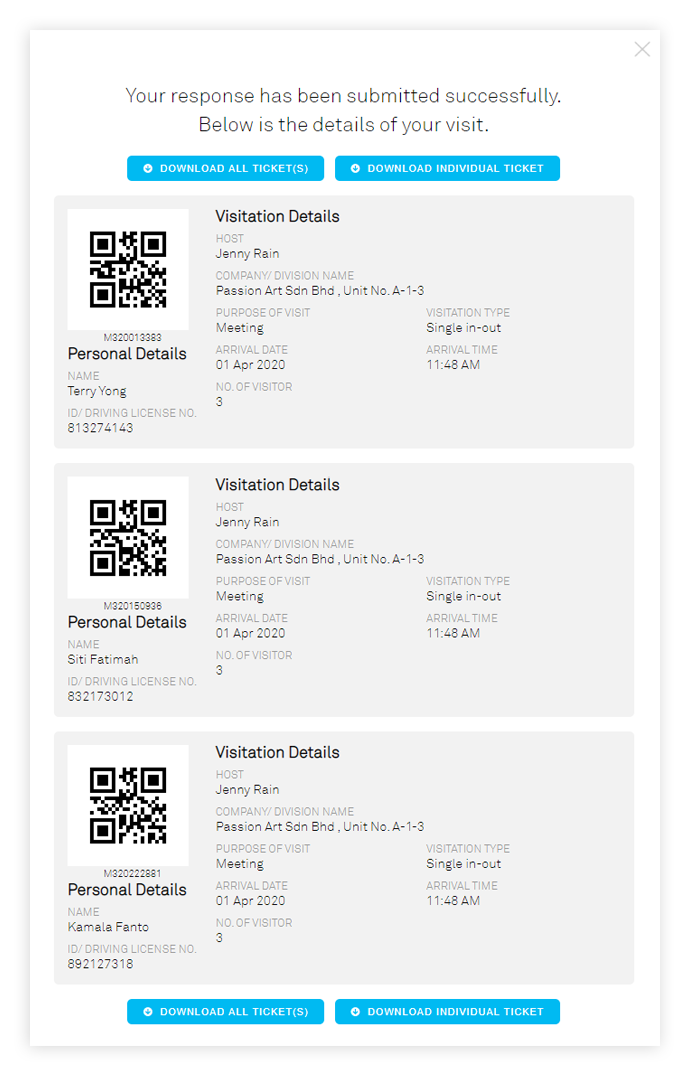
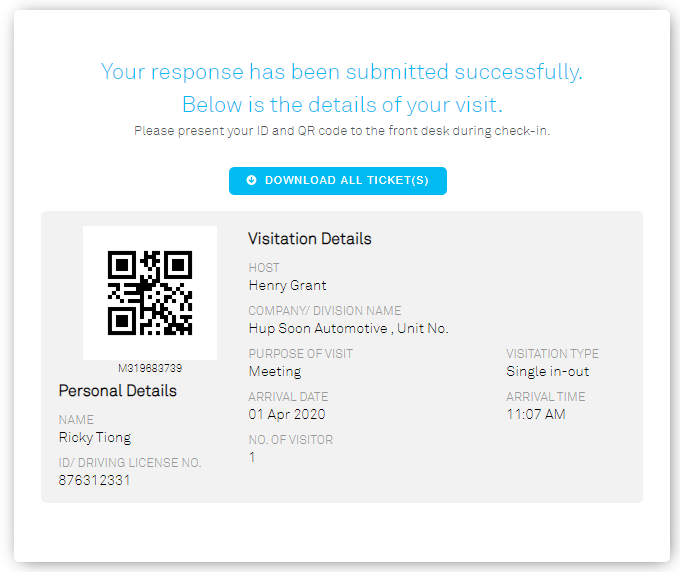
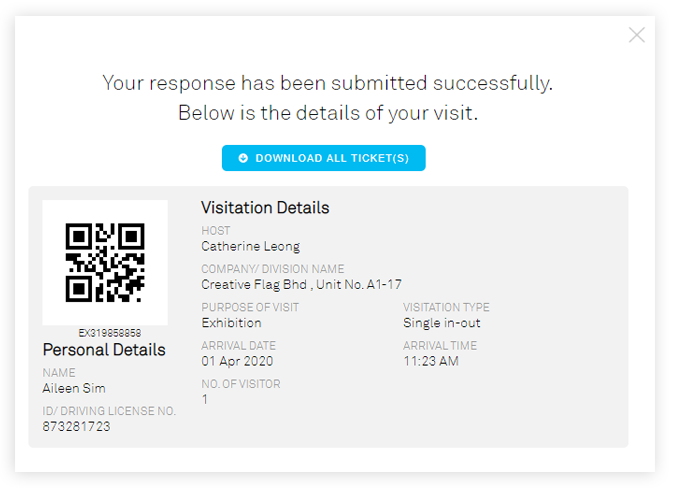
| The QR code is provided at the end of the check-in operation to facilitate the receptionists in printing passes for visitors. Alternatively, users can also capture the QR code using their own smartphone. |
 |
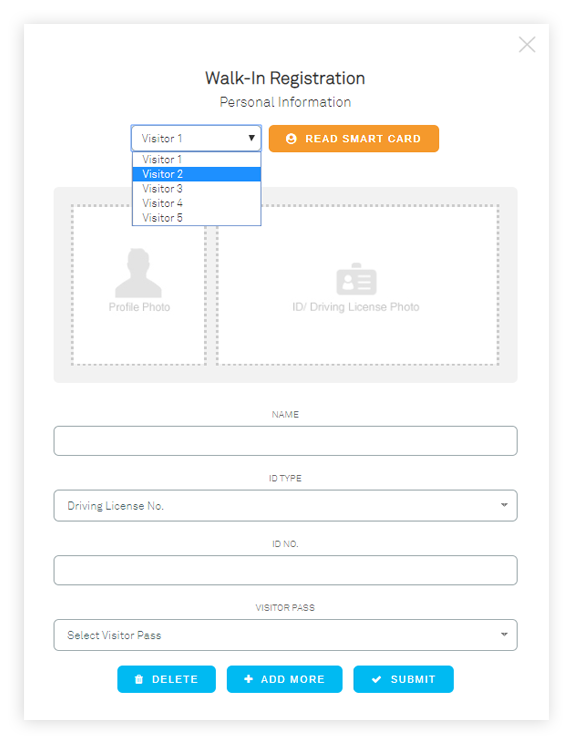
| Group check-in |
| The receptionists/guards can now register visitors by batch using this group visit feature. This group visit feature is available for walk-in registration using both web & app, pre-registration, and also visitor self walk-in registration (Queue Relief). |
 |
 |
 |
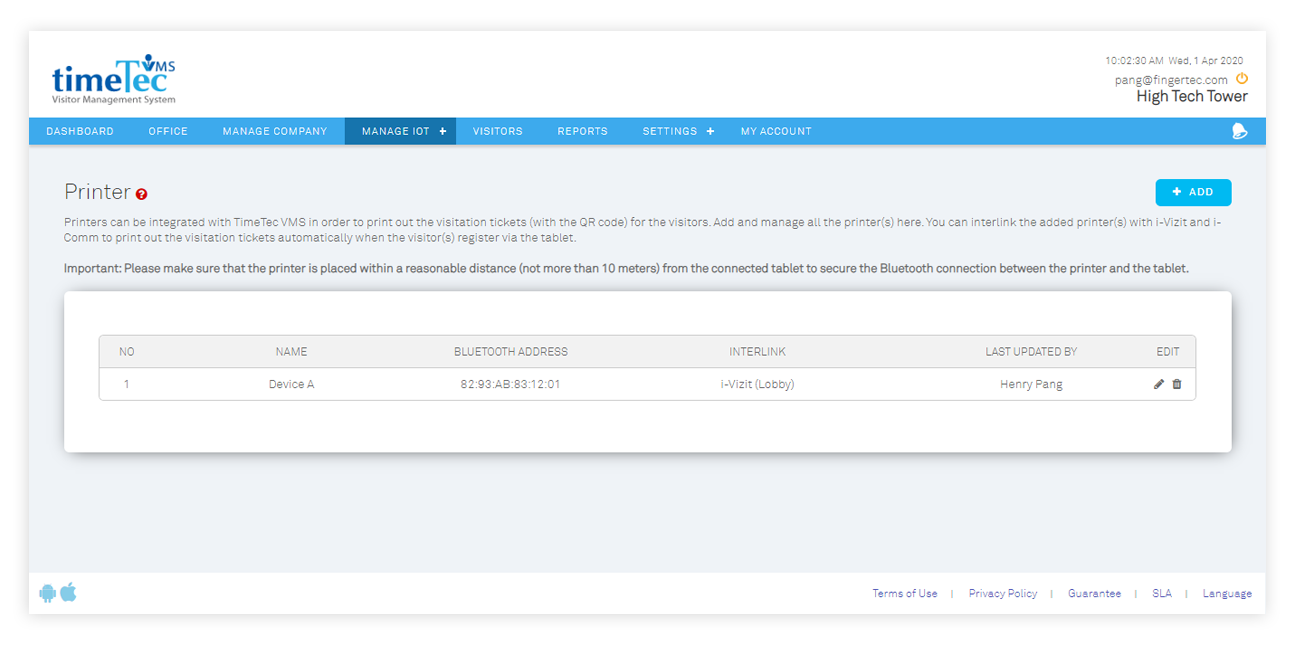
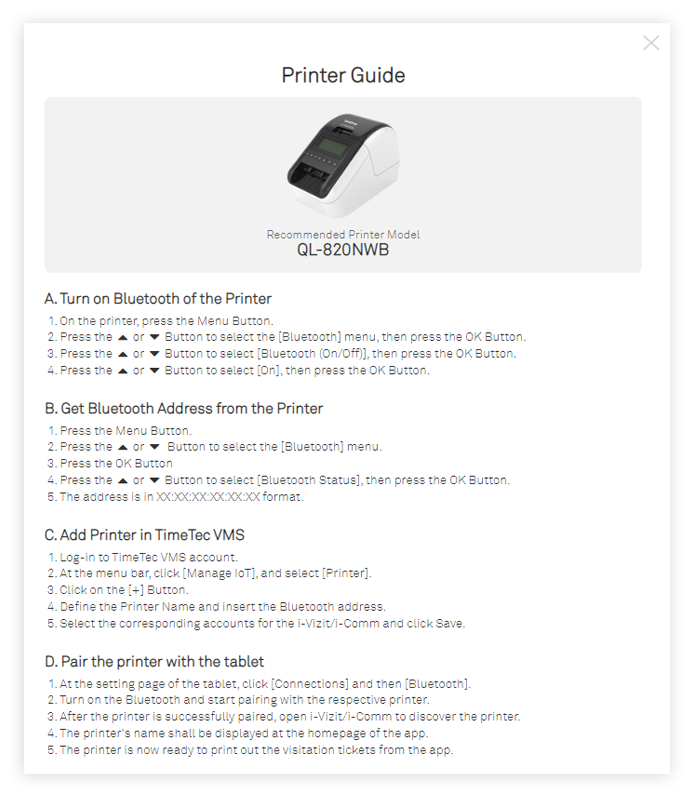
| Printer integration |
| The admin is able to integrate i-Vizit with a label printer (QL-820NWB) in order to print out the visitation QR code directly after registering the visitor using the i-Vizit. |
 |
 |
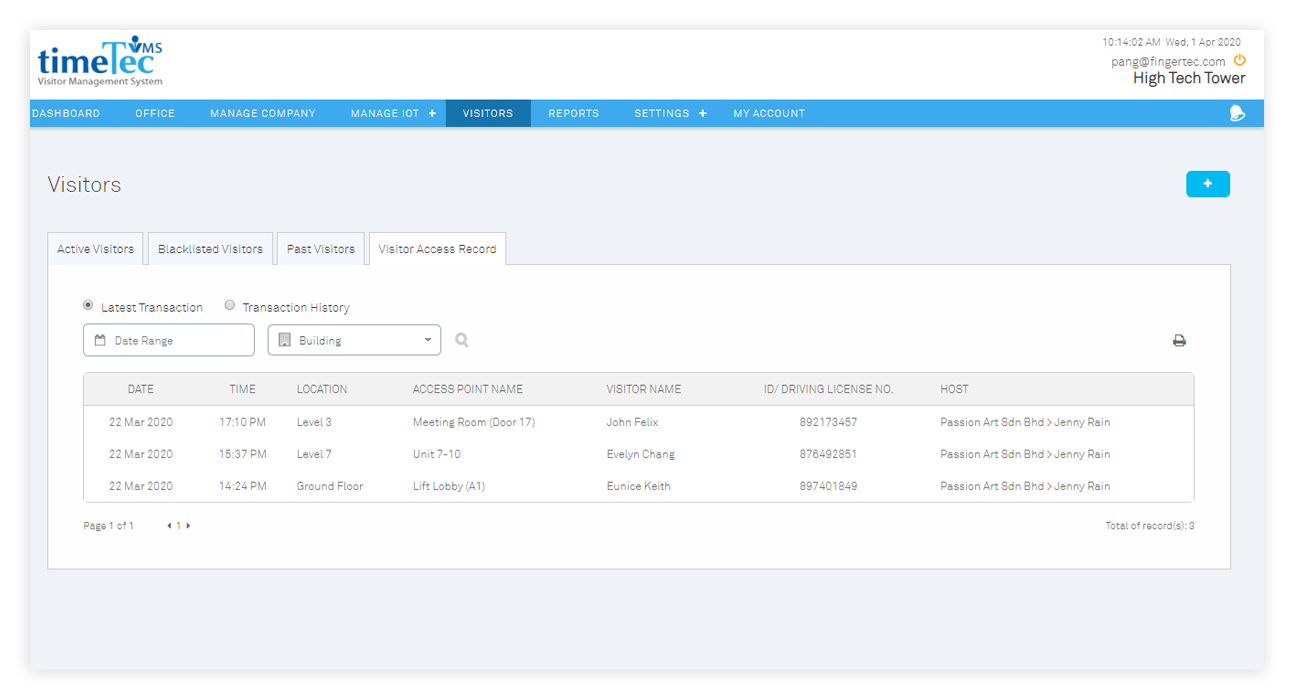
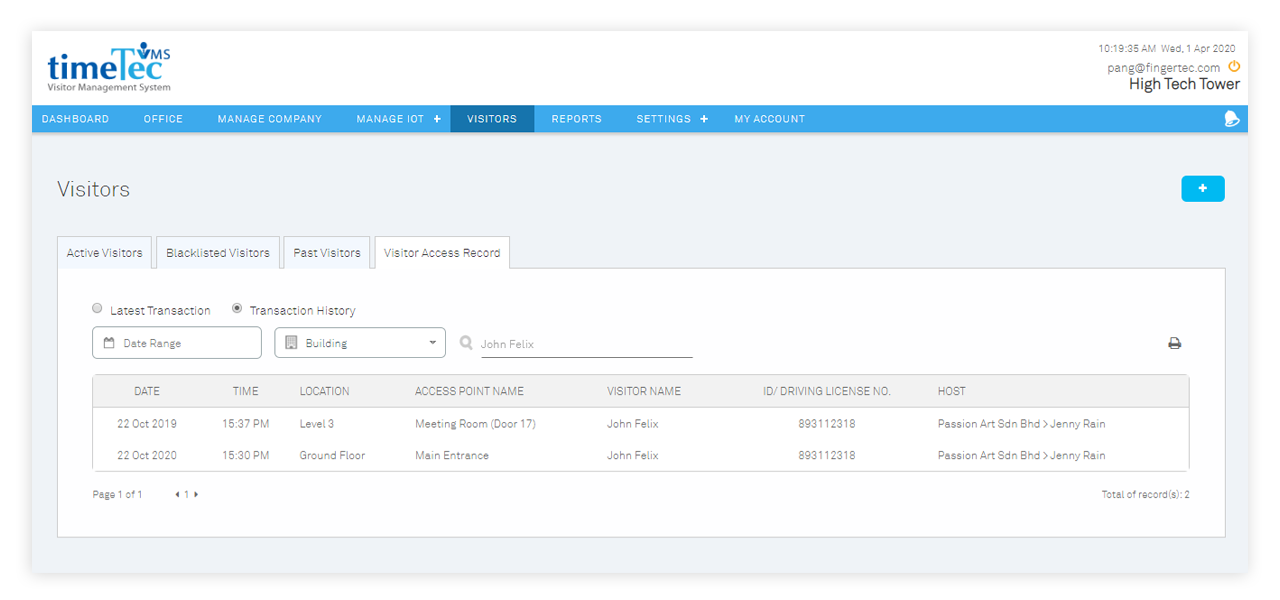
| Visitor Access Report |
| A new report is added to indicate the access points which had been accessed by the visitors.
Latest Transaction View: |
 |
| Transaction History View: |
 |
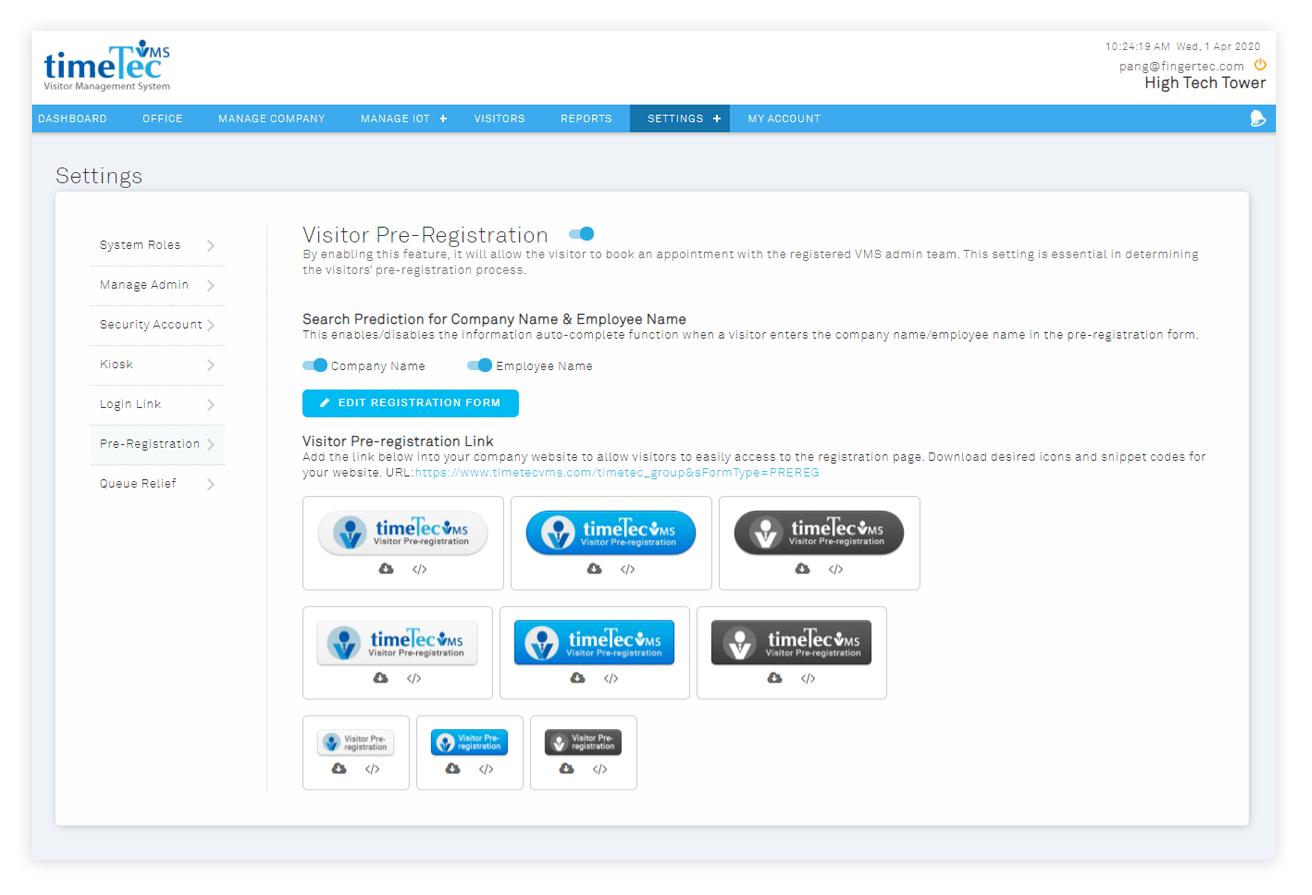
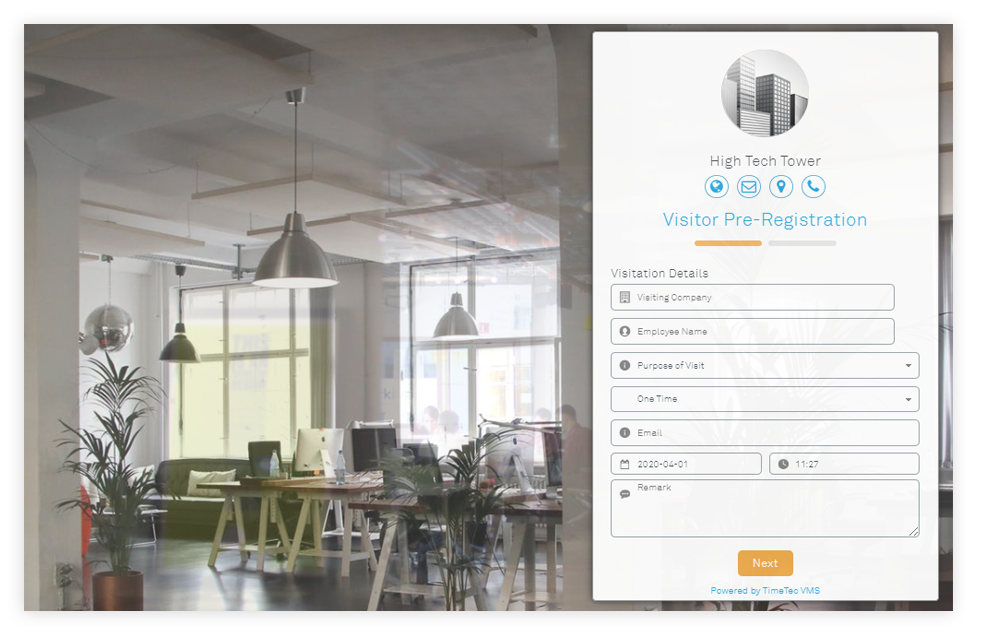
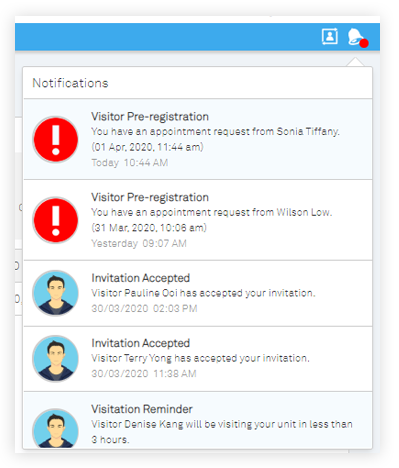
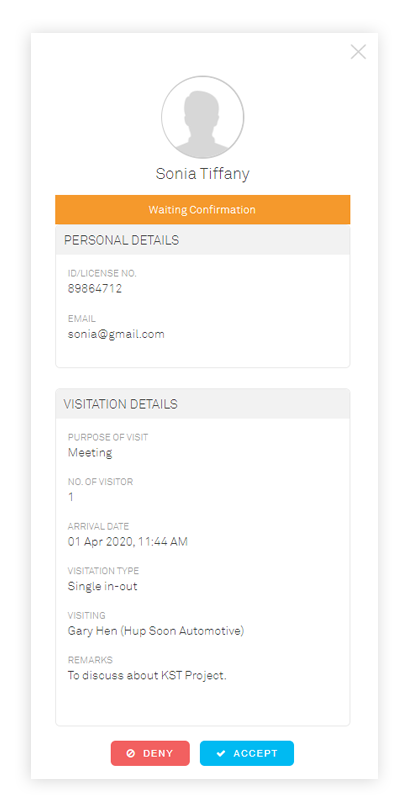
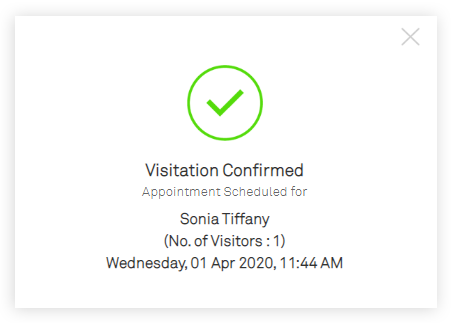
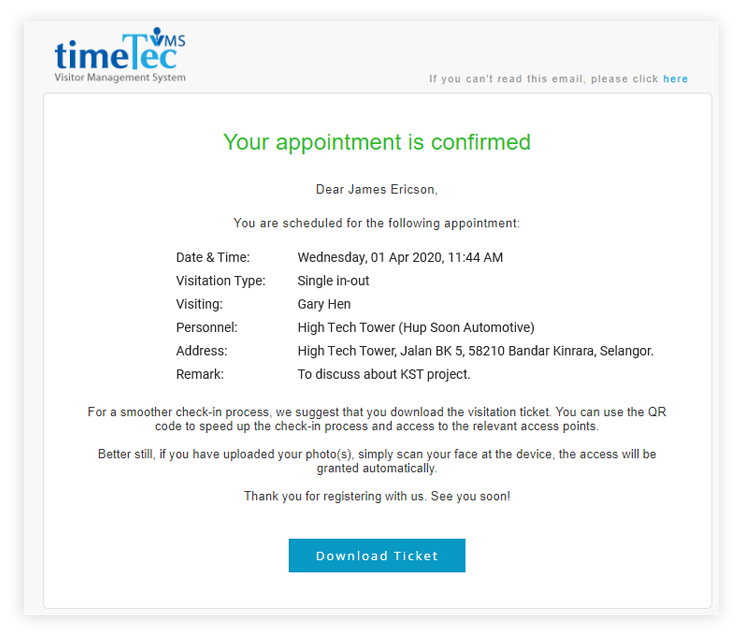
| Visitor Pre-registration Feature |
| The admins will be able to share this link/button on their company website. This feature allows the visitor to register (request for a meeting) prior to the arrival. Group check-in is also available in the pre-registration feature. The employee will receive notifications in regards to the request and will be able to respond accordingly. Once the request has been approved, the visitor will then receive an email notification about the visitation. |
 |
 |
 |
 |
 |
 |
 |
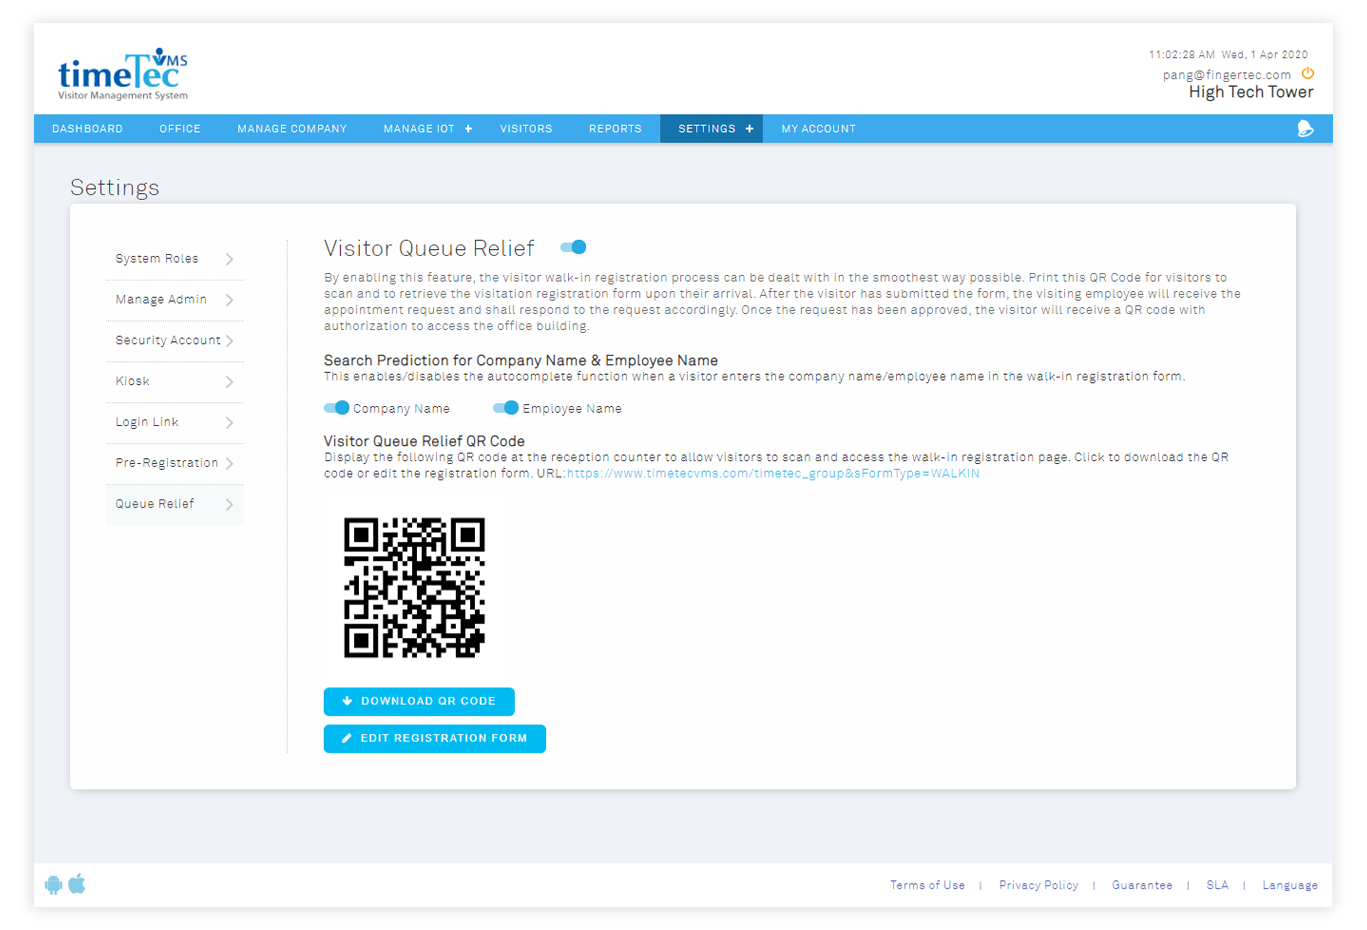
| Visitor Queue Relief |
| Visitor Queue Relief is a feature that allows arrived visitors to scan the available QR code at the counter and fill in the walk-in registration form using their own mobile device. This will ease the operation at the front desk and speed up the queue. After the visitor has completed the form, he/she can then proceed to check-in at the frontdesk. The employee will get notified after the visitor has completed the check in process. |
 |
 |
 |
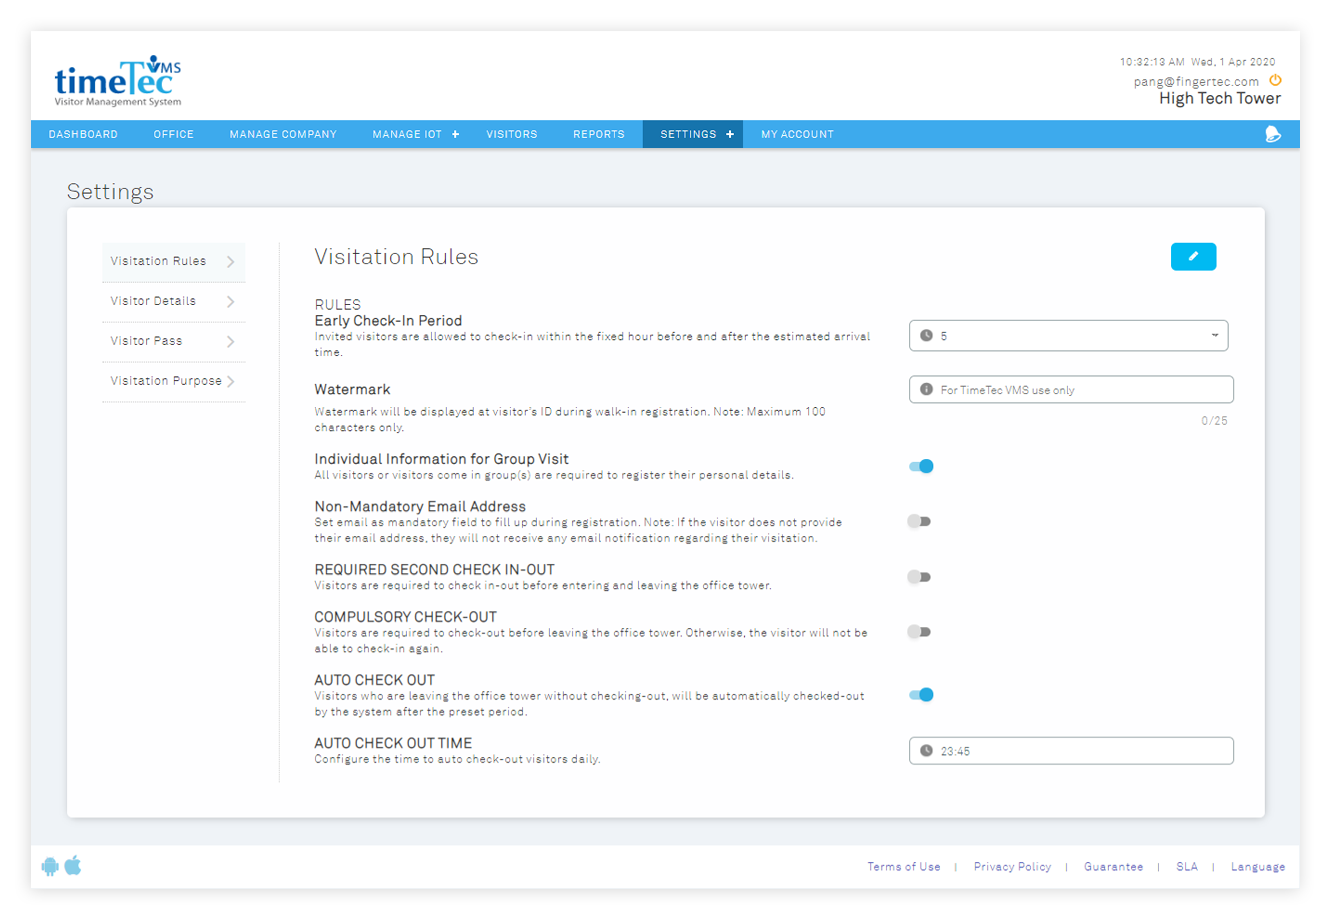
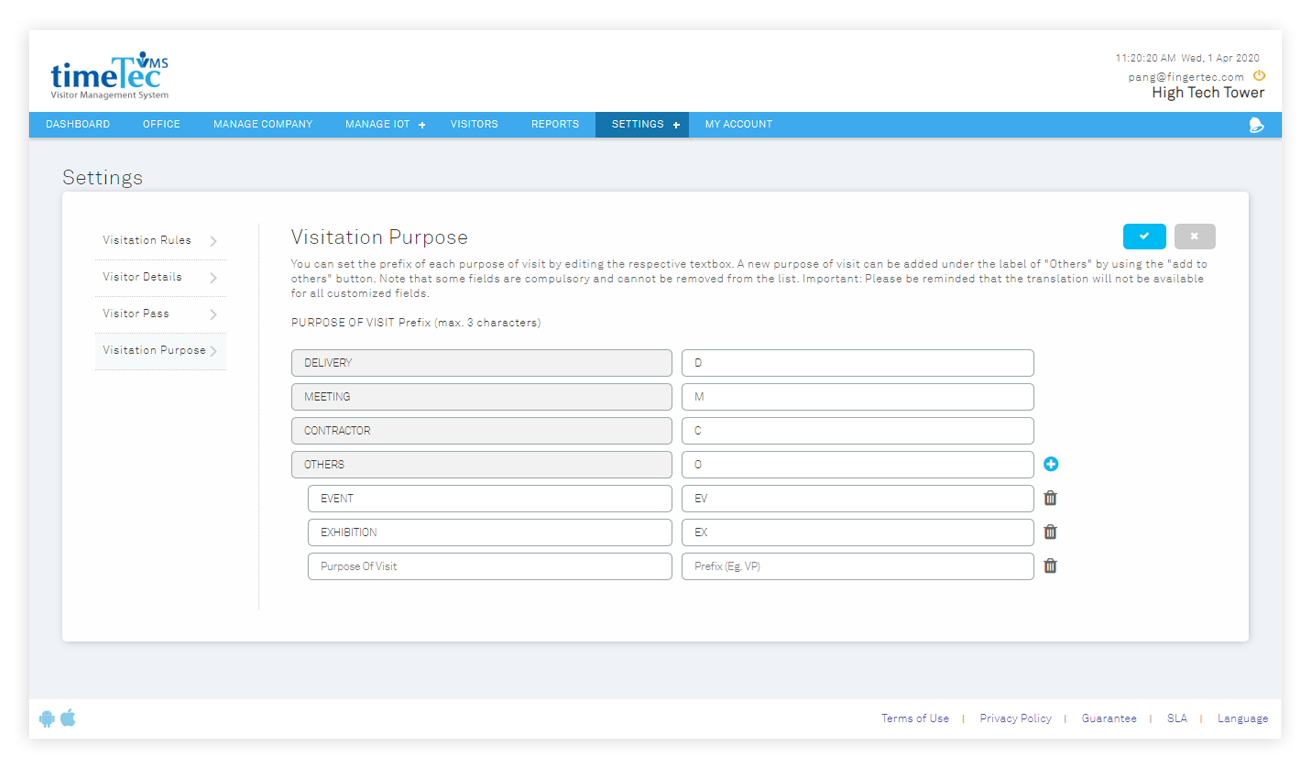
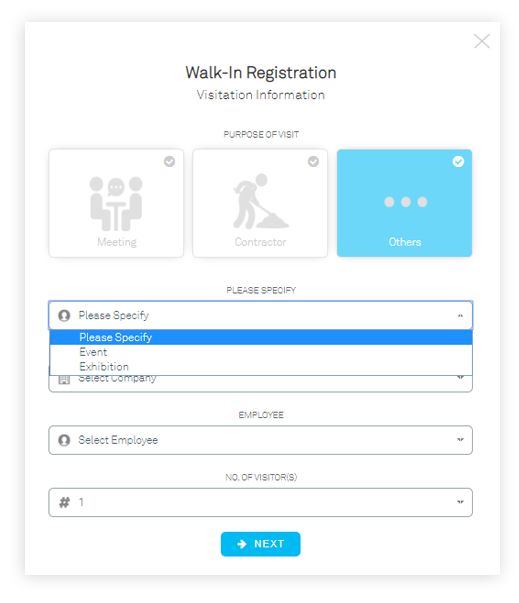
| Propose of Visit |
| The admins can establish a prefix to the different purposes of visit available by editing the respective textbox. A new purpose of visit can be added under the label of "Others" by using the "add to others" button. The prefix will be labelled with the initial on the generated QR code. This allows the guards/admins to quickly differentiate the purpose of the visit of each visitor via the QR code. |
 |
 |
 |
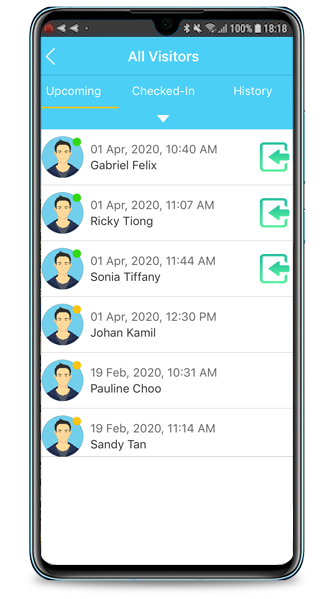
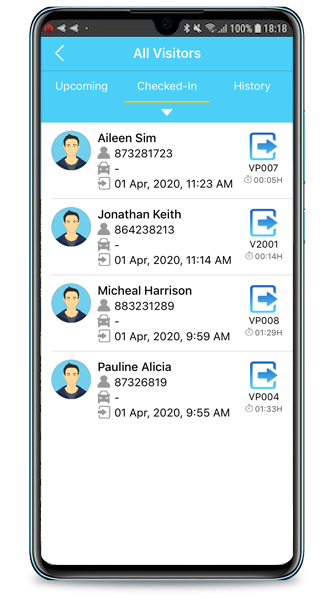
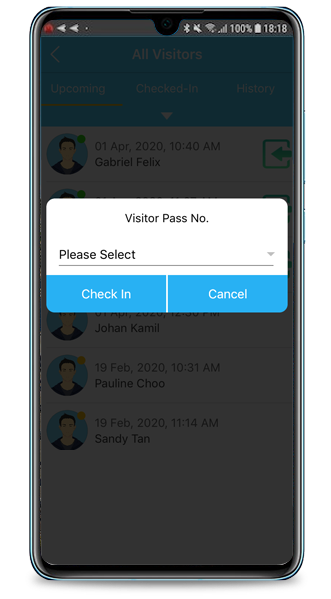
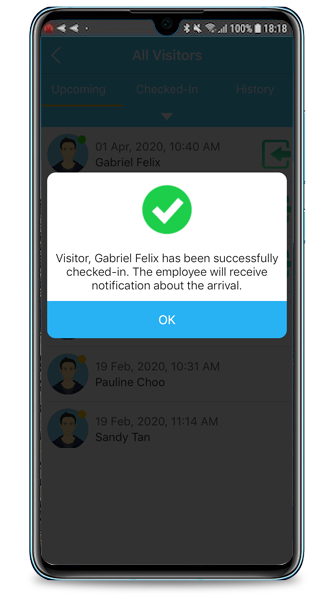
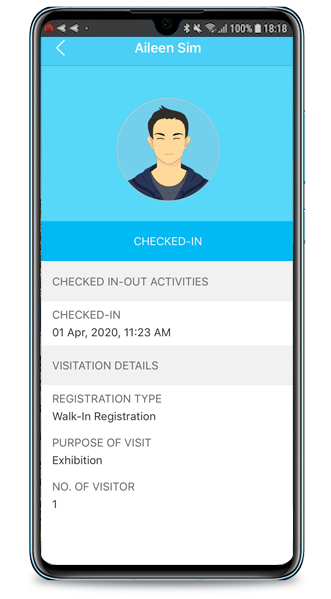
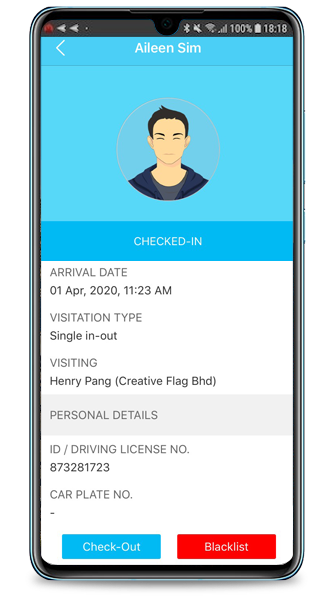
| Check in-out using TimeTec VMS app |
| Now admin can perform check-in out by using the TimeTec VMS app. This feature is available in the Admin account under the visitor module. The check-in out button is provided to allow the admin to easily manage the visitors registration. |
  |
  |
  |
| Previous Issue: Feb 2020 |
| Note: If some of the screenshots or steps viewed here are different from the ones in the current system, this is due to our continuous effort to improve our system from time to time. Please notify us at info@i-neighbour.com, we will update it as soon as possible. |
© 2020 Timetec Computing Sdn. Bhd. All rights reserved.